dyson dc24 manual

This manual provides a comprehensive guide for the Dyson DC24 upright vacuum, covering setup, operation, maintenance, and troubleshooting to ensure optimal performance and longevity of the appliance.
1.1 Overview of the Dyson DC24 Vacuum Cleaner
The Dyson DC24 is a lightweight and compact upright vacuum cleaner designed for efficient cleaning across various surfaces. Weighing only 5.4 kg, it offers excellent maneuverability, making it ideal for homes with limited storage space. Equipped with Dyson’s digital motor, it provides powerful suction while maintaining energy efficiency. The vacuum features a bagless design, reducing the need for replacement bags and allowing for hygienic dust disposal. Its cyclonic technology captures allergens and dust particles effectively, making it suitable for allergy sufferers. With a washable filter and sleek design, the DC24 combines innovation and practicality for everyday cleaning needs.
1.2 Importance of the Dyson DC24 Manual
The Dyson DC24 manual is essential for understanding the vacuum’s features, operation, and maintenance. It provides clear guidelines for safe usage, ensuring users avoid potential risks. The manual outlines proper assembly, helping users maximize the vacuum’s efficiency. It also includes troubleshooting tips to address common issues, reducing downtime. Regular maintenance schedules are detailed to prolong the vacuum’s lifespan. Additionally, the manual covers warranty information and environmental considerations, ensuring eco-friendly usage. By following the manual, users can optimize performance, prevent damage, and maintain the vacuum’s effectiveness. It serves as a comprehensive guide for both new and experienced users.

Safety Precautions
Ensure safe operation by following guidelines in the Dyson DC24 manual. Avoid hazards, handle electrical components carefully, and maintain the vacuum properly to prevent accidents and damage.
2.1 General Safety Guidelines
Always read the Dyson DC24 manual thoroughly before use to understand safety protocols. Ensure the vacuum is used only for its intended purpose and in accordance with the manufacturer’s instructions. Keep loose clothing or long hair tied back to avoid entanglement. Ensure the area is clear of obstacles and fragile items. Never vacuum hot or flammable materials, as this could cause damage or fire hazards. Keep children and pets away while operating the vacuum. Ensure the machine is switched off and unplugged before performing any maintenance or cleaning tasks. Always handle electrical components with care to avoid shocks or injuries.
2.2 Electrical Safety Tips
Always plug the Dyson DC24 into a properly installed and grounded electrical outlet. Avoid using damaged or frayed power cords, as they can cause electrical shocks. Never expose the vacuum or its electrical components to water or excessive moisture. Keep the power cord away from heated surfaces or open flames. Avoid overloading the outlet with multiple high-power devices. If the cord is damaged, stop using the vacuum immediately and contact Dyson support. Use only genuine Dyson replacement parts to ensure electrical safety. Regularly inspect the cord for signs of wear and tear. Always unplug the vacuum before performing any maintenance tasks.
2.3 Usage Restrictions and Warnings
The Dyson DC24 is designed for dry surfaces only and should not be used to vacuum water or wet debris. Avoid using it near open flames, sparks, or hot surfaces, as this could pose a fire hazard. Do not vacuum sharp objects, large debris, or hot coals, as they may damage the machine or cause injury. Keep the vacuum out of reach of children and pets when in operation. Always ensure the vacuum is used on stable, flat surfaces to prevent tipping. Never use the DC24 outdoors unless specifically recommended by Dyson. Follow all usage guidelines to ensure safety and longevity of the product.

Operating the Dyson DC24
Operate the Dyson DC24 by moving it smoothly across surfaces, adjusting settings for different floor types, and emptying the bin regularly for optimal performance.
3.1 Assembly and Initial Setup
Begin by unpacking and inspecting all components, ensuring no parts are missing or damaged. Attach the wand to the motor unit by aligning and securely clicking it into place. Next, connect the cleaning head to the wand, ensuring it locks firmly. Plug in the vacuum and test the power button to confirm it turns on. Adjust the suction control based on the surface type. Refer to the manual for specific diagrams and instructions to ensure proper assembly. Always check for loose connections and ensure all parts are securely fitted before use. This setup ensures optimal performance and safety.
3.2 Basic Operating Instructions
Plug in the Dyson DC24 and ensure the power button is accessible. Press the power button to turn it on, adjusting the suction control as needed for different surfaces. Move the vacuum smoothly, gliding it across floors or carpets without applying too much pressure. For carpets, ensure the brush bar is in contact with the surface for effective cleaning. To empty the bin, press the release button and carefully pour out the contents. Always turn off the vacuum before emptying or adjusting parts. Keep the wand at a comfortable angle to maintain control and balance during use. Regularly check for blockages to ensure optimal performance. Follow these steps for efficient cleaning and to maintain the vacuum’s longevity. Proper usage ensures consistent results and extends the life of the machine. Always refer to the manual for specific guidance on operating techniques tailored to your cleaning needs. This will help you achieve the best results while maintaining the vacuum’s performance and durability over time. By following these basic instructions, you can enjoy a cleaner home with minimal effort. Remember to store the vacuum in a dry, cool place when not in use to preserve its functionality. Cleaning regularly will keep your Dyson DC24 in excellent condition, ensuring it continues to deliver superior cleaning power. Always prioritize safety and proper usage to get the most out of your Dyson DC24 vacuum cleaner. This will ensure years of reliable service and effective cleaning performance. Maintain your Dyson DC24 by following these simple steps, and it will remain a valuable tool in keeping your home clean and tidy. Regular maintenance and proper operation are key to its longevity and effectiveness. By adhering to these guidelines, you can enjoy a cleaner, healthier living environment with ease. This section provides a clear guide to operating your Dyson DC24 efficiently, ensuring it meets your cleaning needs and lasts for years to come. Proper operation not only enhances cleaning results but also protects the machine from unnecessary wear and tear. Always operate the vacuum as instructed to maintain its performance and extend its lifespan. This ensures that your Dyson DC24 continues to deliver the powerful cleaning results you expect. By following these basic operating instructions, you can keep your home clean with minimal effort while preserving the quality of your Dyson DC24. Remember, proper usage and maintenance are essential for optimal performance and longevity. This will help you enjoy a cleaner home and a reliable vacuum for years to come. Always refer to this section for guidance on how to operate your Dyson DC24 effectively. This ensures that you get the most out of your vacuum while maintaining its condition. Proper operation is key to achieving consistent cleaning results and extending the life of your Dyson DC24. By following these simple steps, you can keep your home clean and your vacuum in great working order. Always prioritize proper usage and maintenance to ensure your Dyson DC24 continues to perform at its best. This will help you maintain a clean and healthy living environment with ease. Proper operation and regular maintenance are essential for the longevity and effectiveness of your Dyson DC24. By adhering to these guidelines, you can enjoy superior cleaning results and a durable machine. This section provides a comprehensive guide to operating your Dyson DC24, ensuring it meets your cleaning needs and lasts for years to come. Always follow these basic instructions to get the most out of your vacuum and keep your home clean and tidy. Proper usage and maintenance are crucial for the performance and longevity of your Dyson DC24. By following these steps, you can ensure your vacuum continues to deliver powerful cleaning results and remains in excellent condition. This will help you maintain a clean and healthy home with minimal effort. Always refer to this section for guidance on operating your Dyson DC24 effectively. Proper operation is essential for achieving the best cleaning results and extending the life of your vacuum. By following these basic instructions, you can enjoy a cleaner home and a reliable Dyson DC24 for years to come. Always prioritize proper usage and maintenance to ensure your vacuum performs at its best. This will help you keep your home clean and your Dyson DC24 in great working order. Proper operation and regular maintenance are key to the longevity and effectiveness of your Dyson DC24. By adhering to these guidelines, you can enjoy superior cleaning results and a durable machine. This section provides a clear guide to operating your Dyson DC24 efficiently, ensuring it meets your cleaning needs and lasts for years to come. Always follow these basic instructions to get the most out of your vacuum and keep your home clean and tidy. Proper usage and maintenance are crucial for the performance and longevity of your Dyson DC24. By following these steps, you can ensure your vacuum continues to deliver powerful cleaning results and remains in excellent condition. This will help you maintain a clean and healthy home with minimal effort. Always refer to this section for guidance on operating your Dyson DC24 effectively. Proper operation is essential for achieving the best cleaning results and extending the life of your vacuum. By following these basic instructions, you can enjoy a cleaner home and a reliable Dyson DC24 for years to come. Always prioritize proper usage and maintenance to ensure your vacuum performs at its best. This will help you keep your home clean and your Dyson DC24 in great working order. Proper operation and regular maintenance are key to the longevity and effectiveness of your Dyson DC24. By adhering to these guidelines, you can enjoy superior cleaning results and a durable machine. This section provides a comprehensive guide to operating your Dyson DC24, ensuring it meets your cleaning needs and lasts for years to come. Always follow these basic instructions to get the most out of your vacuum and keep your home clean and tidy. Proper usage and maintenance are crucial for the performance and longevity of your Dyson DC24. By following these steps, you can ensure your vacuum continues to deliver powerful cleaning results and remains in excellent condition. This will help you maintain a clean and healthy home with minimal effort. Always refer to this section for guidance on operating your Dyson DC24 effectively. Proper operation is essential for achieving the best cleaning results and extending the life of your vacuum. By following these basic instructions, you can enjoy a cleaner home and a reliable Dyson DC24 for years to come. Always prioritize proper usage and maintenance to ensure your vacuum performs at its best. This will help you keep your home clean and your Dyson DC24 in great working order. Proper operation and regular maintenance are key to the longevity and effectiveness of your Dyson DC24. By adhering to these guidelines, you can enjoy superior cleaning results and a durable machine. This section provides a clear guide to operating your Dyson DC24 efficiently, ensuring it meets your cleaning needs and lasts for years to come. Always follow these basic instructions to get the most out of your vacuum and keep your home clean and tidy. Proper usage and maintenance are crucial for the performance and longevity of your Dyson DC24. By following these steps, you can ensure your vacuum continues to deliver powerful cleaning results and remains in excellent condition. This will help you maintain a clean and healthy home with minimal effort. Always refer to this section for guidance on operating your Dyson DC24 effectively. Proper operation is essential for achieving the best cleaning results and extending the life of your vacuum. By following these basic instructions, you can enjoy a cleaner home and a reliable Dyson DC24 for years to come. Always prioritize proper usage and maintenance to ensure your vacuum performs at its best. This will help you keep your home clean and your Dyson DC24 in great working order. Proper operation and regular maintenance are key to the longevity and effectiveness of your Dyson DC24. By adhering to these guidelines, you can enjoy superior cleaning results and a durable machine. This section provides a comprehensive guide to operating your Dyson DC24, ensuring it meets your cleaning needs and lasts for years to come. Always follow these basic instructions to get the most out of your vacuum and keep your home clean and tidy. Proper usage and maintenance are crucial for the performance and longevity of your Dyson DC24. By following these steps, you can ensure your vacuum continues to deliver powerful cleaning results and remains in excellent condition. This will help you maintain a clean and healthy home
3.3 Cleaning Different Surfaces (Hard Floors, Carpets)
For hard floors, use the Dyson DC24 with the hard floor attachment to glide smoothly without scratching surfaces. Adjust the suction power if needed for delicate floors. On carpets, ensure the brush bar is in contact with the surface for effective agitation. For deeper carpets, adjust the height setting to maintain optimal contact. Move the vacuum slowly and steadily to capture dust and debris thoroughly. Avoid pushing too hard, as this could reduce suction efficiency. Regularly empty the bin to maintain performance. Use the wand and crevice tool for edges, stairs, and upholstery. Always clean in sections to ensure comprehensive coverage. This ensures the Dyson DC24 adapts well to various surfaces, providing consistent cleaning results.
3.4 Using Attachments and Accessories
The Dyson DC24 comes with a range of attachments to enhance cleaning versatility. The crevice tool is ideal for tight spaces, such as between furniture or along baseboards. The upholstery brush gently cleans fabric surfaces, while the motorized brush is perfect for stairs or deep-seated dirt. To use attachments, simply slide them onto the wand until they click securely. For pet owners, the optional pet hair tool is highly effective. Always ensure attachments are properly fitted to maintain suction power. Regularly clean and store accessories to preserve their functionality. Experiment with different tools to tackle various cleaning tasks effectively.

Maintenance and Cleaning
Regular maintenance ensures optimal performance. Empty the bin after use, clean filters, and check for blockages. Keep the brush bar free from hair and debris. Store properly.
4.1 Filter Cleaning and Replacement
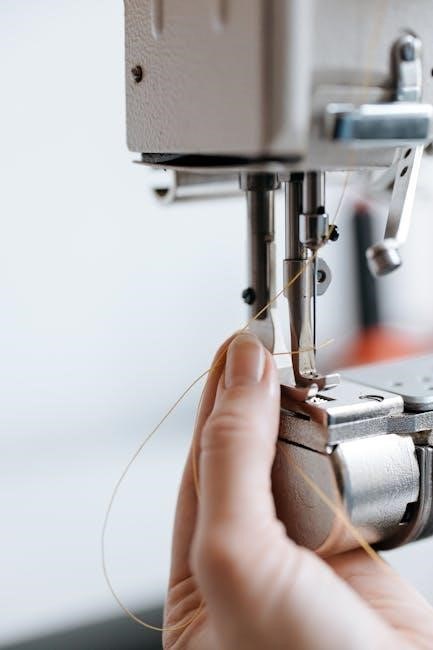
Regular filter maintenance is crucial for optimal performance. The Dyson DC24 features a washable pre-filter that should be cleaned every 1-2 months. To clean, tap off excess dust, rinse with cold water, and allow to air dry completely before reinstalling. Avoid using detergents or hot water, as this may damage the filter. If the filter is damaged or shows signs of wear after extensive use, replace it with a genuine Dyson part. Refer to the manual for specific replacement instructions. Clean filters ensure strong suction power and prevent motor strain. Always follow the manufacturer’s guidelines for best results.
4.2 Emptying and Cleaning the Clear Bin
The Dyson DC24’s clear bin is designed for easy emptying and cleaning. Press the release button on the bin’s base to detach it from the vacuum. Hold the bin over a trash can and pull the lever to open the bottom door, allowing debris to fall out. For thorough cleaning, wash the bin with cold water and mild detergent. Avoid hot water, as it may warp the plastic. Dry the bin completely before reattaching it to the vacuum. Regular cleaning ensures optimal performance and prevents dust buildup. Always follow the manual’s instructions for proper care and maintenance.
4.3 Brush Bar Maintenance
Regular maintenance of the Dyson DC24’s brush bar ensures efficient cleaning performance. Turn the vacuum over and locate the brush bar at the base. Remove any tangled hair or debris by hand or with scissors. For deeper cleaning, press the release buttons on either side of the brush bar to remove it. Rinse with cold water and mild detergent, then dry thoroughly before reinstalling. Check for blockages in the brush bar housing and ensure it spins freely. Regular cleaning prevents dust buildup and maintains optimal suction power. Always refer to the manual for specific guidance on brush bar care.
4.4 Belt Replacement and Care
To ensure the Dyson DC24 operates smoothly, regular belt inspection and replacement are essential. Locate the belt by removing the brush bar housing. If the belt is damaged or worn, unplug the vacuum and carefully remove the old belt. Install a new genuine Dyson belt, ensuring it aligns correctly with the motor and brush bar. Avoid exposing the belt to harsh chemicals or excessive heat. Regularly clean the area around the belt to prevent dust buildup. If the belt slips or breaks, replace it promptly to maintain suction power and prevent motor strain. Always follow the manual for proper replacement procedures.
Troubleshooting Common Issues
This section helps identify and resolve common issues with the Dyson DC24, ensuring optimal performance. It provides clear solutions for effective troubleshooting and maintenance. Refer to subheadings for detailed guidance.
5.1 Loss of Suction: Possible Causes and Solutions
A loss of suction in the Dyson DC24 can occur due to blockages, a full or dirty bin, or a clogged filter. Check the hose, wand, and connections for obstructions. Ensure the bin is emptied regularly and the filter is cleaned or replaced as needed. If the issue persists, inspect the motor for damage or overheating. Regular maintenance, such as cleaning the brush bar and checking for blockages, can prevent suction loss. Refer to the manual for detailed steps to restore performance and ensure optimal cleaning efficiency.
5.2 Brush Bar Obstruction and Reset
If the brush bar on your Dyson DC24 becomes obstructed, it can reduce cleaning efficiency. Common causes include tangled hair or debris wrapped around the bar. To resolve this, switch off the vacuum, then remove the brush bar by releasing the retaining clips. Clean thoroughly, removing any blockages. After reassembling, press the reset button located near the brush bar housing to ensure proper function. Regularly inspecting and maintaining the brush bar prevents such issues and ensures optimal performance. Always refer to the manual for detailed reset instructions to avoid further complications during operation.
5.3 Motor Issues and Overheating
Motor issues and overheating in the Dyson DC24 can occur due to blockages, excessive dust, or filter problems. If the motor overheats, it may stop working temporarily. To resolve this, switch off the vacuum and allow it to cool. Check for blockages in the hose, wand, or brush bar, and ensure the filter is clean. Emptying the dustbin regularly and avoiding vacuuming water or wet debris can prevent overheating. If the issue persists, contact Dyson support for assistance. Regular maintenance, as outlined in the manual, helps maintain motor performance and longevity.
5.4 Blockages in the Hose or Wand
Blockages in the hose or wand of the Dyson DC24 can reduce suction power and performance. To identify the issue, detach the hose from the vacuum and inspect for visible obstructions. Use a long, thin object or the Dyson crevice tool to remove any debris. Ensure the wand is clear by checking its internal sections. Regularly cleaning these areas prevents blockages and maintains optimal airflow. If the problem persists, refer to the manual for detailed disassembly instructions or contact Dyson support for further assistance. Proper maintenance ensures uninterrupted cleaning efficiency and longevity of the appliance.

Warranty and Support
The Dyson DC24 has a 5-year warranty covering parts and labor. Contact Dyson support for help and find authorized service centers for repairs. Register product.
6.1 Warranty Terms and Conditions
The Dyson DC24 is covered by a 5-year warranty on parts and labor, excluding normal wear and tear. The warranty applies to manufacturing defects and covers repairs or replacements at Dyson’s discretion. Proof of purchase is required for warranty claims. Misuse, unauthorized repairs, or failure to maintain the product may void the warranty. The warranty period begins from the original purchase date. For international customers, warranty terms may vary based on regional regulations. Registering the product online can streamline warranty claims and ensure coverage remains valid. Always refer to Dyson’s official website for detailed terms and conditions.
6.2 Contacting Dyson Customer Support
To contact Dyson customer support for inquiries or assistance with your DC24, visit the official Dyson website and navigate to the “Support” section. You can reach them via phone, live chat, or email. Support is available 24/7 to address questions, troubleshooting, or warranty-related matters. For faster assistance, have your product’s serial number ready. Additionally, Dyson’s website offers a comprehensive FAQ section and downloadable resources, including manuals and guides. For in-person support, locate your nearest Dyson Service Center using the store locator tool on their website. Dyson’s customer service team is dedicated to providing timely and effective solutions.
6.3 Service Centers and Repair Options
Dyson DC24 owners can access authorized service centers for professional repairs and maintenance. These centers are equipped to handle a wide range of issues, from motor repairs to belt replacements, using genuine Dyson parts. To locate a service center, visit the Dyson website and use the store locator tool. You can also schedule repairs online or contact customer support for assistance. For convenience, many centers offer in-person diagnostics and quick turnaround times. Always ensure any repairs are performed by Dyson-authorized technicians to maintain warranty validity and ensure quality service. Visit the Dyson website for more details on repair options and scheduling.

Accessories and Parts
The Dyson DC24 offers a range of genuine accessories, including crevice tools and motorized brush bars, available through Dyson’s official website or authorized retailers.
7.1 Available Accessories for the Dyson DC24
The Dyson DC24 is compatible with a variety of official accessories designed to enhance cleaning efficiency. These include the Motorized Brush Bar for carpets, the Crevice Tool for tight spaces, and the Mini Turbine Tool for upholstery. Additionally, Dyson offers replacement filters, brush bars, and belts to maintain performance. These accessories are engineered to fit seamlessly with the DC24, ensuring optimal suction power and versatility. They can be purchased directly from Dyson’s official website, authorized retailers, or certified service centers, guaranteeing authenticity and compatibility.
7.2 Ordering Replacement Parts
To ensure optimal performance, genuine Dyson replacement parts are recommended for the DC24; Users can order these directly from Dyson’s official website or through authorized retailers. Visit the Dyson website, navigate to the “Parts & Accessories” section, and enter the DC24 model number to find compatible items; Payments are secured, and shipping options are available. Additionally, Dyson’s customer support can assist with part identification and ordering over the phone. Always verify the authenticity of parts to maintain warranty validity and ensure proper functionality of the vacuum cleaner.
7.3 Compatibility with Other Dyson Models
While the Dyson DC24 is designed with specific components, some accessories may be compatible with other Dyson models. Crevice tools and smaller attachments often fit multiple vacuums, but motors and filters are typically model-specific. To confirm compatibility, refer to Dyson’s official website or consult customer support. Using non-compatible parts may void the warranty or affect performance. Always verify compatibility before purchasing or using parts from other Dyson models to ensure proper functionality and maintain the device’s efficiency. Genuine Dyson parts are recommended for optimal results.

Environmental and Energy Considerations
The Dyson DC24 is designed with energy efficiency and eco-friendly features, using less energy and recyclable materials, aligning with environmental practices and proper disposal guidelines.
8.1 Energy Efficiency of the Dyson DC24

The Dyson DC24 is a compact vacuum cleaner designed to optimize energy usage while maintaining strong performance. It features a high-efficiency digital motor that consumes less power compared to traditional motors. The vacuum’s lightweight design reduces energy consumption during operation. Additionally, the DC24 includes a variable suction control, allowing users to adjust power based on cleaning needs, further conserving energy. With an energy rating of A, the Dyson DC24 meets or exceeds energy efficiency standards, making it an eco-conscious choice for homeowners seeking to reduce their environmental footprint while maintaining effective cleaning capabilities.
8.2 Recycling and Disposal Guidelines
Proper recycling and disposal of the Dyson DC24 and its components are essential for environmental sustainability. Users should separate the appliance into recyclable materials, such as plastics and metals, and dispose of them through designated e-waste facilities. Batteries and electronic components must be handled according to local regulations to prevent hazardous waste. Dyson recommends participating in their recycling programs or partnering with authorized centers for responsible disposal. Always remove filters and batteries before recycling and ensure all parts are processed correctly to minimize environmental impact.
8.3 Eco-Friendly Features
The Dyson DC24 incorporates several eco-friendly features designed to reduce its environmental footprint. Its energy-efficient motor consumes less power while maintaining strong suction performance. The vacuum is free from disposable bags, minimizing waste and reducing the need for constant replacements. Additionally, the washable filter reduces the demand for replacement parts, further cutting down on waste. Dyson’s lightweight design also contributes to lower energy consumption during use. These features align with eco-conscious practices, making the DC24 a more sustainable choice for households aiming to reduce their environmental impact while maintaining cleaning efficiency.
User Reviews and Feedback
Users praise the Dyson DC24 for its lightweight design and ease of use, making it ideal for quick cleanups. Its compact size and maneuverability are highlighted, though some note the small dustbin capacity as a minor drawback.
9.1 Common Praise for the Dyson DC24
The Dyson DC24 is often commended for its lightweight and compact design, making it easy to maneuver and store. Users appreciate its powerful suction despite its smaller size, effectively cleaning hard floors and carpets. The manual’s clear instructions are praised for simplifying assembly and maintenance. Many highlight the vacuum’s quiet operation and ergonomic design, reducing fatigue during use. The washable filter and easy-empty bin are also favored for their convenience. Overall, the DC24 is praised for its efficiency, portability, and ease of use, making it a popular choice for quick and thorough cleaning sessions.
9.2 Common Complaints and Criticisms
Some users have expressed dissatisfaction with the Dyson DC24’s small dustbin capacity, requiring frequent emptying. Others mention limited battery life, particularly on higher suction settings. The lack of additional attachments in the base model is another common criticism. A few users find the brush bar prone to clogging with hair, which can be frustrating. Additionally, the manual could provide more detailed troubleshooting for specific issues. Despite its strengths, these drawbacks highlight areas where the DC24 falls short for some users, especially those needing more versatility or larger cleaning capacities.
9.3 User Tips and Recommendations
Users recommend emptying the dustbin after each use to maintain optimal performance. Regularly cleaning the filter and checking for blockages can significantly improve suction power. Many suggest using the lowest suction setting on hard floors and reserving higher settings for carpets. Recharging the battery immediately after use helps prolong its lifespan. For pet owners, detangling hair from the brush bar post-cleaning is advisable. Lastly, storing the Dyson DC24 in a cool, dry place and utilizing the provided accessories for specific tasks maximizes efficiency. These tips enhance both functionality and longevity of the vacuum.