closetmaid wire shelving installation instructions pdf

Article Plan: ClosetMaid Wire Shelving Installation Instructions
This comprehensive guide details installing ClosetMaid wire shelving, covering preparation, step-by-step procedures, corner shelf specifics, and maximizing storage—all based on available resources.
ClosetMaid has been a leading innovator in closet organization solutions for over 50 years, pioneering wire shelving systems that offer a blend of affordability, flexibility, and ease of installation. Their ShelfTrack system, in particular, has become a staple for homeowners and professional organizers alike, providing a customizable approach to maximizing closet space.

This guide focuses on providing detailed instructions for installing ClosetMaid wire shelving, drawing from available resources like installation videos and manuals. Whether you’re a first-time DIYer or a seasoned pro, understanding the fundamentals of the system is crucial for a successful outcome. The popularity of ClosetMaid stems from its adaptability to various closet sizes and configurations, allowing users to tailor storage solutions to their specific needs.
We will explore the entire process, from initial closet assessment to final adjustments, ensuring a level, stable, and efficient storage space. Proper installation not only enhances functionality but also contributes to the longevity of the system.
Understanding the Benefits of Wire Shelving
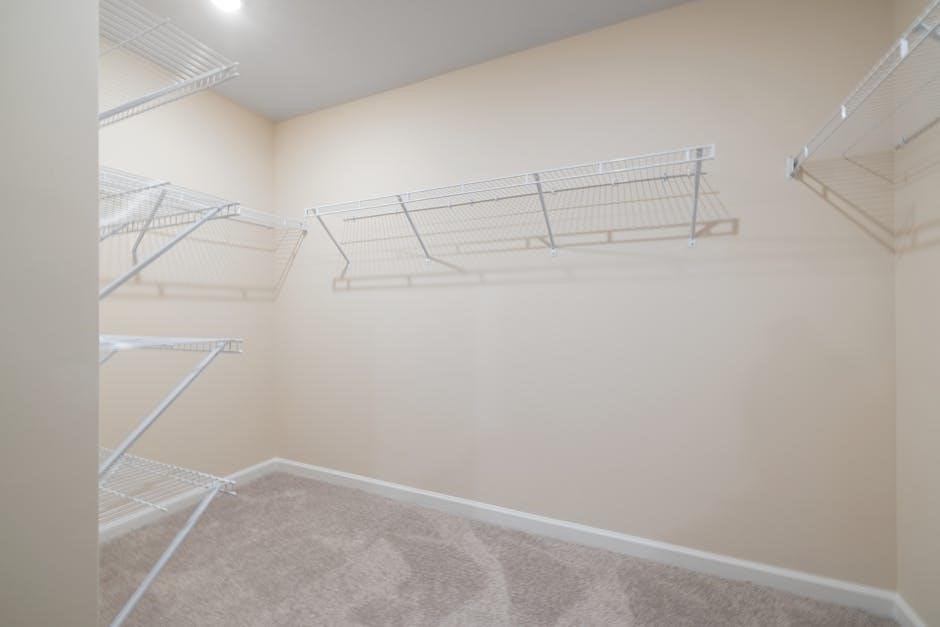
Wire shelving, like ClosetMaid’s offerings, presents numerous advantages over traditional solid shelving. Primarily, its open design promotes airflow, preventing dust buildup and minimizing odors – a significant benefit for clothing storage. This characteristic also makes it ideal for damp environments where moisture control is essential.
Cost-effectiveness is another key benefit; wire shelving is generally more affordable than wood or other solid materials. Installation is notably simpler, often requiring only basic tools and minimal DIY experience, as highlighted in available installation guides. The flexibility of the ShelfTrack system allows for easy adjustments and reconfiguration as storage needs evolve.
Furthermore, wire shelving’s strength-to-weight ratio is impressive, capable of supporting substantial loads without requiring extensive support structures. This makes it a practical solution for organizing a wide range of items, from lightweight garments to heavier boxes.
Tools and Materials Required for Installation
Successful ClosetMaid wire shelving installation necessitates gathering specific tools and materials beforehand. While the shelving kits themselves contain the core components – rails, upright standards, and wire shelves – additional items are crucial. A level is paramount for ensuring shelves are straight and stable, preventing items from sliding.
A drill with appropriate drill bits is essential for securing the upright standards to the wall. Screws, often not included, must be suitable for your wall type (drywall, plaster, or wood). A measuring tape aids in accurate rail placement and shelf cutting. Wire cutters are needed for precise shelf trimming, if required.
Safety glasses protect your eyes during drilling and cutting. A pencil marks locations for rails and standards. Supplemental hardware, like shelf supports, can enhance stability, as suggested by professional installers. Finally, access to the ClosetMaid installation manual or online video resources is highly recommended.
Preparing for Installation: Closet Assessment
Before commencing ClosetMaid wire shelving installation, a thorough closet assessment is vital for optimal results. Begin by completely emptying the closet, removing all contents to provide ample working space. Inspect the closet walls to determine their composition – drywall, plaster, or wood – as this dictates the appropriate screw type for secure mounting of the upright standards.
Measure the closet’s dimensions: height, width, and depth. Note any obstructions like pipes or electrical wiring, carefully planning rail placement to avoid them. Consider your storage needs; what items will be stored on the shelves? This informs shelf height and configuration.
Assess existing wall conditions; repair any damage before installation. Determine if corner shelves (like model 51066) are needed, requiring specific bracket preparation. A well-planned assessment streamlines the installation process and maximizes storage efficiency.
Step-by-Step Installation Guide ⎼ ShelfTrack System
The ClosetMaid ShelfTrack system installation begins with marking the wall for the upright standards. Using a level, ensure vertical alignment for each standard, typically spaced according to your shelving needs. Predrill pilot holes slightly smaller than the screw size to prevent splitting, especially in drywall. Securely fasten the standards to the wall using appropriate screws – length depends on wall type.
Once the standards are in place, the system’s flexibility shines. ShelfTrack allows adjustable shelf heights without needing to relocate standards. Refer to the installation video resources for visual guidance. Ensure standards are firmly attached before proceeding. Proper installation of the standards is crucial for the entire system’s stability and load-bearing capacity.
Double-check alignment before moving to shelf installation.
Installing the ShelfTrack Rails
Begin by carefully measuring and marking the desired locations for your ShelfTrack rails on the closet walls. Utilize a level to guarantee perfectly straight lines, crucial for stable shelving. Predrilling pilot holes is highly recommended, particularly when working with drywall, to prevent cracking or damage.
Secure the rails to the wall studs whenever possible for maximum support. If studs aren’t conveniently located, use appropriate wall anchors designed for the weight capacity you intend to support. Ensure screws are flush with the rail surface to avoid snagging clothing. Consistent spacing between rails dictates shelf adjustability, so plan accordingly.
Refer to the ClosetMaid installation video for a visual demonstration of this process, ensuring correct rail placement and secure fastening.
Attaching the Upright Standards
Once the ShelfTrack rails are securely mounted, it’s time to attach the upright standards. These vertical pieces slot directly into the rails, providing the framework for shelf support. Ensure the standards are fully seated within the rail slots, creating a robust connection.
Pay close attention to the orientation of the standards; they typically have a specific top and bottom. Consistent spacing between standards is vital for accommodating various shelf widths and configurations. A professional installer suggests using a rubber mallet to gently tap the standards into place, ensuring a snug fit without damaging the rails.
Double-check that all standards are plumb (perfectly vertical) before proceeding, as this impacts overall shelf stability. Refer to the ClosetMaid documentation for specific standard placement guidelines.
Installing Wire Shelves ⏤ General Procedure
With the ShelfTrack system installed, adding the wire shelves is relatively straightforward. Begin by selecting the desired shelf height and inserting the shelf clips into the upright standards at the chosen level. Ensure all four clips are at the same height to maintain a level shelf surface.
Carefully position the wire shelf onto the clips, ensuring it sits securely and evenly. A professional installer recommends starting with the top shelf and working downwards, providing stability as you progress. Regularly check for levelness using a spirit level, making adjustments as needed by repositioning the clips.
Remember that wire shelves offer flexibility; you can easily adjust their height later if your storage needs change. Prioritize heavier items on lower shelves for increased stability.
Cutting Wire Shelves to Size
Occasionally, standard wire shelf lengths require customization to perfectly fit your closet space. Cutting wire shelving requires careful consideration to avoid damage and ensure a clean finish. Utilize wire cutters – standard metal cutters may distort the wire. Always wear safety glasses during this process.
Measure the required shelf length accurately, accounting for any obstructions or desired overhang. Mark the cutting point clearly on the shelf. When cutting, apply even pressure to prevent bending or fraying of the wires. After cutting, file down any sharp edges with a metal file to prevent injury.
Remember that once cut, the shelf cannot be restored to its original size. Double-check measurements before cutting, and consider purchasing extra shelving to allow for mistakes.
Corner Shelf Installation (Model 51066)
Installing the ClosetMaid 51066 Wire Shelving Corner requires specific steps to ensure a secure and functional fit. Begin by ensuring you have all necessary tools – a level, drill, and appropriate screws are essential, as these aren’t included. Preparation is key; verify the corner is square and free of obstructions.
The installation involves attaching corner shelf brackets to the walls, ensuring they are level and securely fastened. Use appropriate screws for your wall type to prevent slippage. Once the brackets are in place, carefully position the corner shelf onto the brackets, ensuring it sits flush against both walls.
Refer to the official instruction manual for detailed diagrams and torque specifications. Proper installation guarantees optimal use of corner space and prevents shelf collapse.
Preparing for Corner Shelf Installation
Before installing the ClosetMaid 51066 corner shelf, thorough preparation is crucial for a successful outcome. First, gather all necessary tools: a level, drill, and suitable screws – remember these aren’t supplied with the product. Inspect the corner where the shelf will be placed, ensuring it’s relatively square and free from any obstructions like pipes or wiring.
Carefully measure the available space to confirm the shelf will fit comfortably without interfering with doors or other closet components. It’s also wise to identify your wall type (drywall, plaster, or wood) to select the appropriate screws for secure mounting. A stud finder can be helpful for locating wall studs for added support.
Review the instruction manual to familiarize yourself with the bracket placement and screw requirements before beginning the installation process.
Attaching Corner Shelf Brackets
With the corner area prepared, begin attaching the specialized brackets designed for the ClosetMaid 51066 wire shelving corner. Position the brackets according to the instruction manual, ensuring they are level and aligned correctly. Use a pencil to mark the screw hole locations on the wall.
Pre-drilling pilot holes is recommended, especially when working with hard surfaces, to prevent splitting the wood or damaging drywall. Securely fasten the brackets to the wall using the appropriate screws, chosen based on your wall type. Double-check that each bracket is firmly attached and can support the weight of the shelf and its contents.
For enhanced stability, consider mounting the brackets directly into wall studs whenever possible. Ensure all brackets are at the same height to create a level shelving surface.
Leveling and Supporting Wire Shelves
Achieving level shelves is crucial for both aesthetics and functionality. Utilize a spirit level to verify the horizontal alignment of each installed wire shelf. Minor adjustments can be made by slightly repositioning the ShelfTrack rails or adding shims beneath the upright standards. Consistent leveling prevents items from sliding and ensures a professional finish.
For shelves spanning longer distances, consider adding supplemental support. ClosetMaid offers additional shelf supports or you can utilize readily available hardware. These supports minimize shelf sagging over time, particularly when loaded with heavier items. Proper support extends the lifespan of the shelving system and enhances its overall stability.
Regularly inspect the shelves for any signs of drooping or instability, making adjustments as needed.
Troubleshooting Common Installation Issues
Difficulty aligning ShelfTrack rails often stems from uneven wall surfaces. Use shims behind the rails to compensate, ensuring a secure and level mounting. If screws strip during installation, utilize larger diameter screws or wood glue with toothpicks to reinforce the screw holes before re-screwing.
Shelves not fitting properly can usually be resolved by double-checking measurements and ensuring the correct shelf length is being used. Remember wire shelves can be cut to size. Sagging shelves indicate insufficient support; add extra shelf supports or reposition weight distribution.
For corner shelf issues (Model 51066), verify correct bracket attachment and levelness. If problems persist, consult the official ClosetMaid installation video resources for visual guidance.
Securing Shelves for Stability
Beyond standard clip installation, enhancing shelf stability involves strategically utilizing supplemental hardware. Consider adding small L-brackets underneath shelves, particularly for heavier items, to prevent sagging and provide extra support. Ensure all screws are firmly tightened, but avoid over-tightening, which can strip the screw holes.
For increased rigidity, especially with longer spans, explore using a bead of construction adhesive along the ShelfTrack rail before clip insertion. This creates a stronger bond. Regularly inspect the installed system, re-tightening screws as needed to counteract any loosening over time.
Proper weight distribution is crucial; avoid concentrating heavy loads in one area. Utilizing the full depth of the shelf also contributes to stability.
Maximizing Storage Space with Wire Shelving
Wire shelving’s inherent design promotes visibility and airflow, optimizing space utilization. Utilize vertical space effectively by stacking items neatly and employing shelf dividers to create designated zones. Consider adding ClosetMaid’s Organise Kits, designed to integrate seamlessly with the wire system, offering solutions for shoes, sweaters, and accessories.
Maximize under-shelf space with hanging baskets or additional wire shelves. Adjustable shelving allows customization to accommodate varying item heights. Regularly declutter to prevent overcrowding and maintain accessibility. Explore utilizing the back wall of the closet with wire baskets or hooks for smaller items.
Proper organization transforms a simple wire shelving system into a highly efficient storage solution, maximizing every inch of available space.
ClosetMaid Installation Video Resources
ClosetMaid offers a wealth of video resources to guide you through every stage of installation. Their official ShelfTrack installation video provides a comprehensive, easy-to-follow demonstration of the entire process, from rail installation to shelf attachment. These videos visually explain each step, ensuring a smoother DIY experience.
Supplemental videos often focus on specific techniques, like leveling shelves or cutting wire to size, addressing common challenges installers face. Searching online platforms like YouTube for “ClosetMaid ShelfTrack installation” will yield numerous helpful tutorials from both ClosetMaid and experienced installers.
These visual aids complement the PDF instructions, offering a dynamic learning experience and boosting confidence in tackling the project.
Supplemental Hardware for Enhanced Installation
While ClosetMaid systems are designed for straightforward installation, utilizing supplemental hardware can significantly improve stability and aesthetics. Consider using wall anchors, especially when mounting into drywall, to provide a more secure hold for the ShelfTrack rails and upright standards.
Self-leveling shims are invaluable for ensuring perfectly horizontal shelves, particularly in older homes where walls may not be entirely plumb. Screw covers can conceal the mounting hardware for a cleaner, more finished look. Some installers recommend using a stud finder to locate wall studs for maximum support.
These additions, though not included in the standard kit, address potential installation challenges and elevate the overall quality of the finished closet organization system.
Organise Kits and Wardrobe Solutions
ClosetMaid’s “Organise” kits offer pre-configured solutions designed to maximize storage in closets and wardrobes. These kits, available through retailers like Organise My Home, feature innovative wire shelving systems tailored for various spaces and needs. They simplify the planning process, providing a curated selection of components for efficient organization.
Beyond standard closet applications, these systems are adaptable for creating wardrobe spaces in bedrooms lacking built-in storage. The flexibility of wire shelving allows customization to fit specific clothing types and accessories. Kits often include adjustable shelves, drawers, and hanging rods, offering a comprehensive storage solution.
Selecting the right kit streamlines installation and ensures a cohesive, organized result, transforming cluttered spaces into functional wardrobes.
Post-Installation Inspection and Adjustments
Following installation, a thorough inspection is crucial to ensure stability and functionality. Begin by verifying that all ShelfTrack rails and upright standards are securely mounted to the wall studs, preventing future shifting or collapse. Carefully examine each wire shelf, confirming it’s properly seated on the clips and brackets.

Address any leveling issues immediately; slight adjustments to the clip positions can rectify uneven shelves. Check for sharp edges or protruding hardware that could pose a safety hazard. Ensure all screws are tightened appropriately, avoiding over-tightening which could damage the wall or shelving components.
Finally, test the weight capacity of each shelf with representative items, making further adjustments as needed to optimize storage and stability.
Safety Precautions During Installation
Prioritize safety throughout the ClosetMaid wire shelving installation process. Always wear safety glasses to protect your eyes from dust and debris during drilling and cutting. Utilize a sturdy ladder and maintain three points of contact when working at height. Be mindful of electrical wiring and plumbing within the closet walls – use a stud finder to locate these before drilling.
When cutting wire shelves, wear gloves to prevent injury from sharp edges. Ensure adequate ventilation when using power tools. If you are unsure about any step, consult a professional installer or refer to the official ClosetMaid installation video resources.
Never exceed the weight capacity of the shelving system, and always secure shelves properly to prevent accidents.