marble roller coaster project pdf
The Marble Roller Coaster Project is an engaging STEM activity where participants design and build tracks using foam pipe insulation and masking tape. It teaches physics concepts like energy transfer and motion while fostering creativity and problem-solving skills.
1.1 Overview of the Project
The Marble Roller Coaster Project involves designing and constructing a track for marbles using foam pipe insulation and masking tape. The objective is to create a functional roller coaster that demonstrates physics principles like gravity, friction, and energy transfer. Students learn problem-solving skills, creativity, and scientific concepts while building and testing their designs. This hands-on activity encourages critical thinking and collaboration, making it an engaging STEM experience.
1.2 Historical Background of Roller Coasters
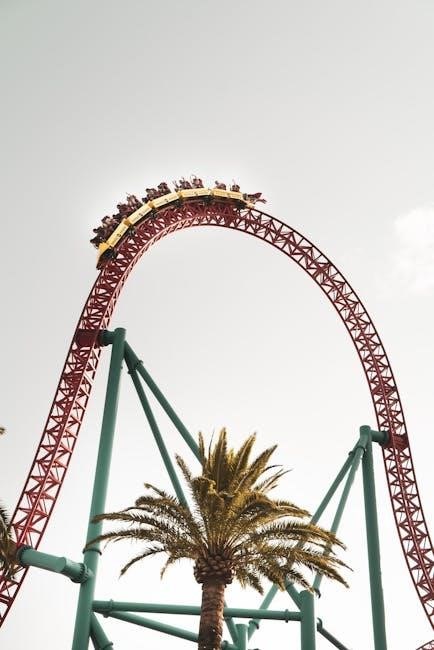
Roller coasters trace their origins to 16th-century Russia with the “Russian Mountains,” early ice slides that inspired modern designs. They evolved in Europe and the U.S., gaining popularity in the late 19th and early 20th centuries with the introduction of steel structures. This historical evolution influences the Marble Roller Coaster Project, blending traditional engineering principles with modern creativity to educate participants about physics and design.

The Science Behind Marble Roller Coasters
The Marble Roller Coaster demonstrates physics principles such as potential and kinetic energy conversion, gravity-driven motion, and frictional forces. It illustrates Newton’s laws and energy transfer efficiency through track design and marble movement.
2.1 Physics Principles Involved
The marble roller coaster project involves fundamental physics principles such as gravity, friction, and energy conservation. Students explore how potential energy converts to kinetic energy as marbles descend. They also analyze Newton’s laws of motion and the impact of track design on marble velocity and trajectory. These concepts help in understanding the physics behind roller coasters while making learning interactive and fun.
2.2 Gravity, Friction, and Energy Transfer
Gravity drives the marble’s motion, converting potential energy into kinetic energy as it descends. Friction, a opposing force, reduces speed and efficiency. Energy transfer from potential to kinetic is central, while friction causes energy loss. Understanding these forces helps in optimizing the coaster’s design, ensuring smooth motion and maximizing marble velocity. This hands-on approach makes complex physics concepts accessible and engaging for learners of all ages.
2.3 Potential and Kinetic Energy in Motion
Potential energy is stored as the marble rests at heights, converting to kinetic energy as it moves downhill. The marble’s speed increases with descent, illustrating energy conservation. Hills and dips in the track demonstrate how energy transforms between potential and kinetic states. This dynamic interaction showcases fundamental physics principles, providing a practical example of energy transfer and motion in a fun, interactive way for learners to explore and understand.
2.4 Newton’s Laws of Motion Applied
Newton’s laws govern the marble’s motion. The first law explains inertia, as the marble maintains motion unless friction or gravity intervenes. The second law relates force, mass, and acceleration, visible in curves and drops altering the marble’s speed. The third law is evident in interactions, like the marble pushing backward on the track as it moves forward. These principles provide a foundational understanding of the marble’s dynamic behavior throughout the coaster’s path.

Materials and Tools Required
- Cardboard or foam tubing for the track.
- PVC pipes or wooden dowels for support.
- Scissors or craft knives for cutting materials.
- Hot glue gun for assembling components.
- Tape for securing parts.
- Ruler or measuring tape for precise cuts.
- Marbles for testing.
3.1 Common Materials Used
The marble roller coaster project typically uses cardboard, foam tubing, or PVC pipes for the track. Wooden dowels or plastic rods are often used for support. Cardboard boxes, scissors, and hot glue guns are essential for construction. Additional materials include tape, rulers, and marbles of varying sizes. These affordable and accessible components allow for creativity and experimentation while building the coaster.
3.2 Essential Tools for Construction


Key tools include scissors, craft knives, or utility knives for cutting materials. Hot glue guns are crucial for bonding components securely. Rulers and measuring tapes ensure accurate measurements, while pencils mark cutting lines. Tape, such as masking or duct tape, holds pieces in place. Clamps or weights stabilize structures during gluing. Sandpaper smooths rough edges, and a protractor aids in creating precise angles for the track.
3.3 Safety Considerations
Always wear protective gloves when handling sharp tools like scissors or craft knives. Ensure your workspace is clear and stable to prevent accidents. Keep long hair tied back to avoid entanglement with tools. Exercise caution when using hot glue guns to avoid burns. Ensure the roller coaster structure is stable and secure to prevent tipping. Use barriers or containers to keep marbles from rolling away and causing slips or breakage.
Construction Process
Constructing a marble roller coaster involves designing the layout, building the structure, assembling components, and testing the marble run to ensure smooth operation and durability.
4.1 Designing the Track Layout
Designing the track layout for a marble roller coaster involves careful planning to ensure smooth marble movement. Start by sketching the design on paper, considering elements like hills, curves, and loops. Use graph paper to help with measurements and angles. Ensure the track starts from a high point to utilize gravity effectively. Incorporate guardrails to prevent marbles from falling off, especially on curves and drops. Keep the track length balanced—long enough for an enjoyable ride but not impractical. Consider using wood for durability and ease of construction. Test sections of the track to refine the design and ensure functionality. Look for existing plans or tutorials online for inspiration and guidance. Aim for a design that is both functional and visually appealing, starting simple and gradually adding complexity as skills and confidence grow.
4.2 Building the Roller Coaster Structure
Constructing the roller coaster structure begins with cutting and assembling the frame using wood or plastic materials. Ensure the base is sturdy to support the entire setup. Attach the track securely, using glue or tape for stability. Add supports at critical points to prevent sagging. Test the structure by rolling a marble through it to identify weak spots. Sand rough edges and reinforce joints as needed for durability.
4.3 Assembling the Components
Begin by attaching the pre-cut tracks to the frame, ensuring alignment and stability. Secure loops, curves, and drops using glue or tape. Add supports at turns and steep angles to maintain the marble’s path. Use clamps to hold pieces while bonding. Gradually integrate hills and valleys, testing the marble’s flow at each stage. Ensure smooth transitions between sections for consistent motion and energy preservation.
Testing and Troubleshooting
Test each section of the roller coaster to ensure smooth marble flow. Identify and address issues like jams or uneven tracks. Adjust designs as needed for optimal performance and safety.
5.1 Initial Testing of the Marble Run
Begin by conducting a slow, controlled release of marbles to observe their movement through the track. Start with one marble at a time to identify potential blockages or uneven sections. Pay attention to how the marbles navigate curves, drops, and inclines. If the marble stalls or falls off, note the location and adjust the structure accordingly. Ensure the track is stable and secure before proceeding. Repeat the process with multiple marbles to assess performance consistency and make necessary adjustments for smooth operation.
5.2 Identifying and Fixing Common Issues
Common issues include marbles stalling, tracks collapsing, or uneven motion. Inspect the track for alignment problems or loose connections. Tighten joints and ensure smooth transitions between sections. If marbles lose momentum, check for excessive friction or sharp turns. Gently sand rough edges or adjust the track’s angle to improve flow. For instability, add supports or reinforce weak points to prevent collapse during testing.
5.3 Refining the Design for Optimal Performance
Refining the design involves adjusting slopes, heights, and curves to ensure smooth marble flow. Test different materials to reduce friction and enhance durability. Experiment with track angles to maintain consistent speed and momentum. Analyze each run to identify bottlenecks and areas for improvement. Small tweaks can significantly impact performance, ensuring a thrilling and efficient marble roller coaster experience.

Incorporating STEM Learning
Integrate science, technology, engineering, and math by applying physics concepts, designing structures, and conducting mathematical calculations to optimize the marble roller coaster’s performance and functionality.
6.1 Engineering Design Process
The engineering design process involves asking, imagining, planning, creating, testing, and improving solutions. For the marble roller coaster, this means defining the problem, brainstorming ideas, sketching designs, building prototypes, testing runs, and refining based on outcomes. This iterative approach fosters critical thinking, creativity, and problem-solving skills, essential for STEM education. Students learn to analyze failures, adjust designs, and optimize performance, mirroring real-world engineering practices.
6.2 Applying Physics Concepts
The marble roller coaster project demonstrates fundamental physics principles, such as gravity, friction, and energy transfer. Students observe how potential energy converts to kinetic energy as marbles descend. Friction and gravity influence the marble’s speed and trajectory. Newton’s laws explain the motion, and energy conservation illustrates how friction reduces efficiency. These concepts help predict and optimize the marble’s path, fostering a deeper understanding of physics in action.
6;3 Mathematical Calculations and Measurements
Mathematics plays a crucial role in designing and optimizing marble roller coasters. Students calculate the height, length, and angles of tracks, ensuring proper slopes for consistent speed. Time and speed measurements help determine acceleration and energy transfer. Geometric calculations are used for loops and curves, while data collection refines designs. Budgeting and material constraints also require mathematical planning to create efficient and cost-effective solutions.
Safety and Precautions
Ensure protective gear is worn, and sharp objects are avoided. Adult supervision is recommended for children. Use non-toxic materials and secure the structure to prevent accidents during testing.
7.1 General Safety Guidelines
Always wear protective gear like gloves and goggles. Ensure the workspace is clear of clutter and tripping hazards. Avoid using sharp or heavy materials that could cause injury. Keep loose clothing tied back and long hair secured. Ensure the structure is stable before testing. Supervise children during construction and testing. Handle marbles and small parts carefully to avoid accidents. Regularly inspect the setup for any potential risks or weaknesses.
7.2 Specific Precautions for the Project
Specific precautions for the marble roller coaster project include ensuring the structure is stable and secure to prevent collapse. Protect all edges and points to avoid injuries. Use protective coverings to prevent marbles from launching out and causing accidents. Handle materials carefully to avoid cuts. Regularly inspect the track for wear and tear. Secure all loose parts to prevent them from coming off during operation. Ensure proper supervision, especially when children are involved, and always test the coaster at low speeds initially.
Advanced Modifications and Ideas
Explore advanced modifications like loops, curves, and theming to enhance your marble roller coaster. Consider adding automation, sensors, or timers for launching marbles. Experiment with different track materials for varied effects, encouraging creativity and STEM learning through innovative design.
8.1 Adding Loops and Curves
Add loops and curves to create thrilling paths for marbles. Use flexible materials like plastic tubing or metal wire to form smooth transitions. Ensure loops are large enough to maintain marble momentum, preventing drops. Secure curves with adhesives or tape for stability. Experiment with different loop sizes and curve angles to optimize marble flow and enhance visual appeal. This modification introduces advanced engineering challenges and fun.
8.2 Theming and Aesthetics
Enhance your marble roller coaster’s visual appeal by incorporating themes and aesthetics. Use paint, stickers, or decorations to create vibrant designs. Add themed elements like miniature buildings, trees, or lights to personalize the structure. This step fosters creativity and transforms the coaster into a visually engaging display. Choose lightweight, durable materials to maintain stability while adding decorative flourishes. Personalization makes the project unique and showcases artistic skills alongside engineering prowess.
8.3 Automating the Marble Launch
Automate the marble launch for consistent starts and enhanced functionality. Use springs, rubber bands, or small motors to propel marbles uphill. Integrate timers or sensors to release marbles at set intervals. Arduino or microcontrollers can program complex launch sequences. Automation ensures uniform speed and reduces manual intervention, improving performance and reliability. This feature adds a technological twist, making the roller coaster more interactive and modern.

Case Studies and Examples
Explore inspiring examples of marble roller coasters, showcasing creativity and problem-solving. Highlight successful builds from schools, hobbyists, and competitions, providing a detailed analysis of their designs and outcomes.
9.1 Successful Marble Roller Coaster Projects
Successful marble roller coasters often showcase creativity and engineering skills. Many projects feature intricate designs with loops, curves, and elevations. Schools and competition winners highlight problem-solving through trial and error. These examples demonstrate how proper material selection and structural integrity ensure durability. They also illustrate how optimizing tracks for smooth transitions enhances marble speed and efficiency, providing valuable insights for builders. These projects inspire innovation and learning in STEM fields.
9.2 Lessons Learned from Failed Attempts
Failed attempts in marble roller coaster projects often reveal crucial lessons. Structural instability, inadequate support, and poor material choices are common issues. Friction and energy loss can hinder marble movement. Design flaws, such as sharp turns or steep drops, may cause marbles to fly off. These failures highlight the importance of precise measurements, testing, and iterative design improvements. Learning from mistakes enhances problem-solving skills and leads to better, more efficient designs over time.

Frequently Asked Questions (FAQs)
This section addresses common questions about building marble roller coasters, offering guidance on materials, safety, troubleshooting, and tips for optimizing performance and design effectively.
10.1 Common Queries About the Project
Common questions include inquiries about materials, safety measures, and troubleshooting tips. Many ask about optimizing marble speed and ensuring smooth tracks. Others seek advice on design complexity and budget constraints. Beginners often wonder how to start and what tools are essential. Experienced builders may inquire about advanced features like loops or automated launches. Addressing these queries helps ensure a successful and enjoyable marble roller coaster project experience for all participants.
10.2 Tips for Beginners
Start with a simple design to understand the basics of motion and gravity. Use sturdy materials like cardboard or wood for durability. Ensure tracks are smooth and well-aligned to maintain marble momentum. Test sections incrementally to identify and fix issues early. Practice patience, as trial and error are key to success. Keep safety in mind and have fun while learning fundamental physics concepts through this engaging DIY project;
The marble roller coaster project combines creativity with physics, teaching fundamental concepts like motion and energy. It fosters problem-solving skills and creativity. A fun, educational DIY activity that sparks innovation and curiosity in STEM fields for enthusiasts of all ages.
11.1 Summary of the Project
The marble roller coaster project is a creative and educational activity that combines physics, engineering, and design. Participants design and build a track using various materials, observing how marbles navigate through loops, curves, and drops. This hands-on project demonstrates principles like gravity, friction, and energy transfer, while fostering problem-solving and teamwork. It serves as a fun and interactive way to learn about motion and forces, making complex concepts accessible and engaging for learners of all ages.
11.2 Benefits of Building a Marble Roller Coaster
Building a marble roller coaster offers numerous benefits, including fostering creativity, enhancing problem-solving skills, and encouraging teamwork. It provides hands-on learning opportunities, teaching physics concepts like motion and gravity. Additionally, it improves critical thinking, patience, and perseverance. The project also introduces engineering principles, sparking interest in STEM fields. Overall, it’s an engaging way to develop multiple skills while having fun.

Further Resources
Explore books, online tutorials, and videos for detailed guides. Join forums and social media groups for inspiration. Visit educational websites for free plans and expert tips.
12.1 Recommended Reading
Find detailed guides in books like “Marble Roller Coaster Engineering” and “Physics in Motion.” Download “DIY Marble Coasters” and “STEM Project Guides” for step-by-step instructions. Explore academic papers on energy transfer and friction. Visit online libraries or educational websites for free PDF resources. These materials offer comprehensive plans, safety tips, and creative ideas to enhance your project. They are perfect for both beginners and experienced builders seeking inspiration or technical insights.
12.2 Online Tutorials and Videos
Explore YouTube channels like DIY with Chris and Physics Girl for detailed marble roller coaster tutorials. Websites like Instructables and Khan Academy offer step-by-step guides and videos. Check out STEM-focused playlists for tips on optimizing designs. Platforms like Pinterest and Reddit share creative ideas and troubleshooting advice. These resources provide visual guidance and inspiration to help you build and refine your marble roller coaster project effectively.